

Color-coding a budget means assigning a distinct color to each spending or income category so you can see where your money goes at a glance, without reading a single number twice. It works especially well for visual learners, planner lovers, and anyone who has stared at a spreadsheet full of black text and felt nothing click. Here is how to start right now:
- Gather your materials. Pull last month’s bank and credit card statements, grab a set of highlighters or open a digital color palette, and choose a simple tracker (such as a notebook, a printed budget form, or a blank spreadsheet).
- Pick 6–10 categories. Fewer than six tends to lump too much together; more than ten creates color confusion. Common ones are housing, groceries, transportation, utilities, savings, debt payments, dining out, personal care, and a miscellaneous catch-all category.
- Assign one color per category, then total each color. Highlight or tag every transaction, add up each color group, and compare those totals to your income.
That is the whole system. Everything below makes it faster, prettier, and harder to quit.
Quick-start checklist:
- Recent bank and credit card statements
- Highlighters (3–5 colors minimum) or a digital color palette
- A simple tracker: printed budget page, notebook, or blank spreadsheet
- A calculator or phone
Table of Contents
- How do you set up a color-coded budget step by step?
- What color schemes actually work for budgeting?
- How do you set up conditional formatting for budget tracking?
- How does color-coding work on paper with cash envelopes?
- How do you keep a color-coded budget working month after month?
- How does color-coding map to the 50/30/20 and 70-10-10-10 rules?
- How long does setup take and what does it cost?
- Where can you find ready-to-use templates and tools?
- Do visual budget systems actually produce results?
- Key Takeaways
- Why the prettiest budget is often the one you actually open
- Handcrafted budgeting tools from Mariaandherjournal
- Useful sources and templates
How do you set up a color-coded budget step by step?
The setup takes one focused session, typically a brief period, for a first pass. Follow these steps and you will have a working system before the day is over.
-
List your categories. Aim for 6–10. Fewer than six tends to lump too much together; more than ten creates color confusion. A solid starter list: Housing, Groceries, Transportation, Utilities, Savings, Debt Payments, Dining and Entertainment, Personal Care, and a catch-all Miscellaneous. Setting budget categories that stick is worth reading before you finalize this list.
-
Assign one color per category. Keep the palette functional and emotionally neutral. Avoid colors you associate with shame or failure. Green for savings feels motivating. Blue for housing feels calm and stable. Red works better as an alert color in a digital tracker than as a permanent category label on paper.
-
Enter all transactions first, then color-code. Logging and highlighting at the same time increases miscategorization, especially when transactions come from multiple accounts. Get everything on the page, then go back and color.
-
Total each color group. Add up every transaction in each color. This is your actual monthly spend per category.
-
Compare totals to your income. If a color’s total exceeds what you budgeted for it, that category needs attention. If it comes in under, you have room to redirect funds toward savings or debt.
-
Decide your next action. Over budget on dining? Reduce the envelope cash for next month. Under budget on groceries? Move the surplus to savings before you spend it on something else.
Pro Tip: Write your budget amounts in pencil the first month. Real spending almost never matches the first estimate, and you want room to adjust without crossing things out.
What color schemes actually work for budgeting?
Choosing colors is faster when you start from a purpose rather than a preference. Here are four ready-to-use palettes.
Traffic-light scheme (green, yellow, red)
Green = on track or under budget. Yellow = approaching the limit (within 80%). Red = over budget. This scheme works best in a digital tracker where conditional formatting does the coloring automatically. On paper, it can feel punishing if red shows up constantly in the first few months, so pair it with a fourth neutral color (gray or beige) for fixed bills that never change.
Goal-first palette
Assign your most important financial goal the most visually prominent color. Savings in bright teal, debt payments in deep purple, essentials in soft blue, and fun money in warm yellow. The visual weight of teal on the page keeps savings front of mind every time you open the tracker.
Minimalist soft palette
Blush, sage, dusty blue, warm cream, and soft lavender. This is the palette that fits naturally with the Mariaandherjournal aesthetic and works especially well in a handwritten binder or planner. The colors are distinct enough to tell apart but gentle enough that the tracker feels pleasant to open daily, which matters more than most people expect.

Accessibility note
Roughly 8% of men and 0.5% of women have some form of color vision deficiency, with red-green being the most common type. If you share your tracker with a partner or want to future-proof your system, pair colors with icons or patterns: a dollar sign icon for savings, a house icon for housing, a fork for food. In Google Sheets, add a letter prefix to category labels (S for savings, H for housing) so the cell is readable even without color.
How do you set up conditional formatting for budget tracking?
This tutorial uses Google Sheets. Excel equivalents follow each step.
The basic column structure
Set up four columns: Category, Budget, Actual, and Difference (formula: =B2-C2, where B is Budget and C is Actual). A fifth column for % Used (=C2/B2) makes the warning rule easier to write.
The three conditional formatting rules
Apply these to the Actual column (or the Difference column if you prefer). In Google Sheets: Format → Conditional formatting → Custom formula.
| Rule | Formula | Fill Color |
|---|---|---|
| Over budget | =C2>B2 |
Red (#FF4C4C) |
| Warning zone | =C2/B2>=80% |
Yellow (#FFD9) |
| Under budget | =C2<B2 |
Green (#57BB8A) |
Rule order matters. Place the over-budget (red) rule at the top of the list so Google Sheets evaluates it first. If yellow sits above red, an overspent cell will turn yellow instead of red, which defeats the purpose. In Excel, the same logic applies under Conditional Formatting → Manage Rules: drag the red rule to position one.
For a SPARKLINE progress bar in an adjacent cell, use: =SPARKLINE(C2/B2,{"charttype","bar";"max",1;"color1","#57BB8A"}). When the ratio exceeds 1 (over budget), the bar fills past its boundary, giving you an immediate visual cue without reading the number.
Troubleshooting checklist:
- Colors not updating? Check that calculation is set to Automatic (File → Settings → Calculation in Sheets; Formulas → Calculation Options in Excel).
- Rules applying to wrong rows? Confirm the formula range matches the data range exactly.
- All cells turning one color? Check for a dollar sign locking the cell reference (
$B$2instead ofB2) when you need a relative reference.
Pro Tip: Enter every transaction for the month before applying or adjusting any formatting rules. Coloring as you go increases the chance of miscategorizing a transaction that posts from a different account than expected.
How does color-coding work on paper with cash envelopes?
The paper method is not a workaround for people who avoid technology. For many budgeters, physically handling cash and writing totals by hand produces stronger spending awareness than any app.
What you need:
- Cash-stuffing envelopes (one per category), printed or handmade
- A set of highlighters or colored pens
- Colored dot stickers or washi tape for labeling
- Recent bank and credit card statements
- A printed budget form or binder page
The workflow, step by step:
Following the paper-first approach that many budgeters find most effective:
- Print or gather your statements and lay them flat.
- Assign one highlighter color to each envelope category.
- Highlight every line item on the statement with its matching color.
- Total each color group. These are your real spending numbers.
- Use those totals to decide how much cash goes into each envelope for next month.
- Label each envelope with its color and category name. Colored dot stickers work well here.
Syncing paper and digital records: At the end of each week, photograph your highlighted statements and transfer category totals into a Google Sheet. You get the tactile benefit of paper and the backup of a digital record. A quick phone photo of the open binder also makes it easy to spot at a glance whether any envelope is running low.
For envelope labeling ideas and category examples, the Mariaandherjournal blog has a practical breakdown worth bookmarking.
How do you keep a color-coded budget working month after month?
The system only fails when it becomes a chore. A short, predictable routine prevents that.
Weekly quick-check (5 minutes)
Open your tracker or flip through your envelopes. Check one thing: is any category more than 80% spent with more than a week left in the month? If yes, decide now whether to pull from another category or cut spending. That single decision, made early, prevents the end-of-month scramble.
Monthly deep review (20–30 minutes)
Total every color, compare to budget, note which categories ran over and which ran under, and set next month’s amounts. A good template keeps this focused: goal, numbers, timeline, status, and next action. Five fields. Nothing more.
When to change categories or colors
Merge two categories when you consistently forget which one a transaction belongs to. Split a category when one line item regularly dominates the total and hides the rest. Change a color only when it stops feeling motivating, not just because you are bored. Color changes mid-month create confusion, so make them at the start of a new cycle.
Seasonal and irregular bills: Annual expenses like car registration or holiday gifts deserve their own temporary category in the months they hit. Create a “Seasonal” envelope or row in October, fund it from your miscellaneous buffer, and archive it in January. Aggressive savings pushes work the same way: temporarily reclassify dining and entertainment as a single “Flex” category and redirect the savings to your goal color.
How does color-coding map to the 50/30/20 and 70-10-10-10 rules?
Color-coding does not require a specific budgeting framework, but it makes any framework easier to follow visually.
50/30/20 color layout (example: $3,000 net monthly income)
| Category | Rule % | Monthly Amount | Suggested Color |
|---|---|---|---|
| Needs (housing, utilities, groceries, transport) | 50% | $1,500 | Blue |
| Wants (dining, entertainment, personal care) | 30% | $900 | Yellow |
| Savings and debt payoff | 20% | $600 | Green |
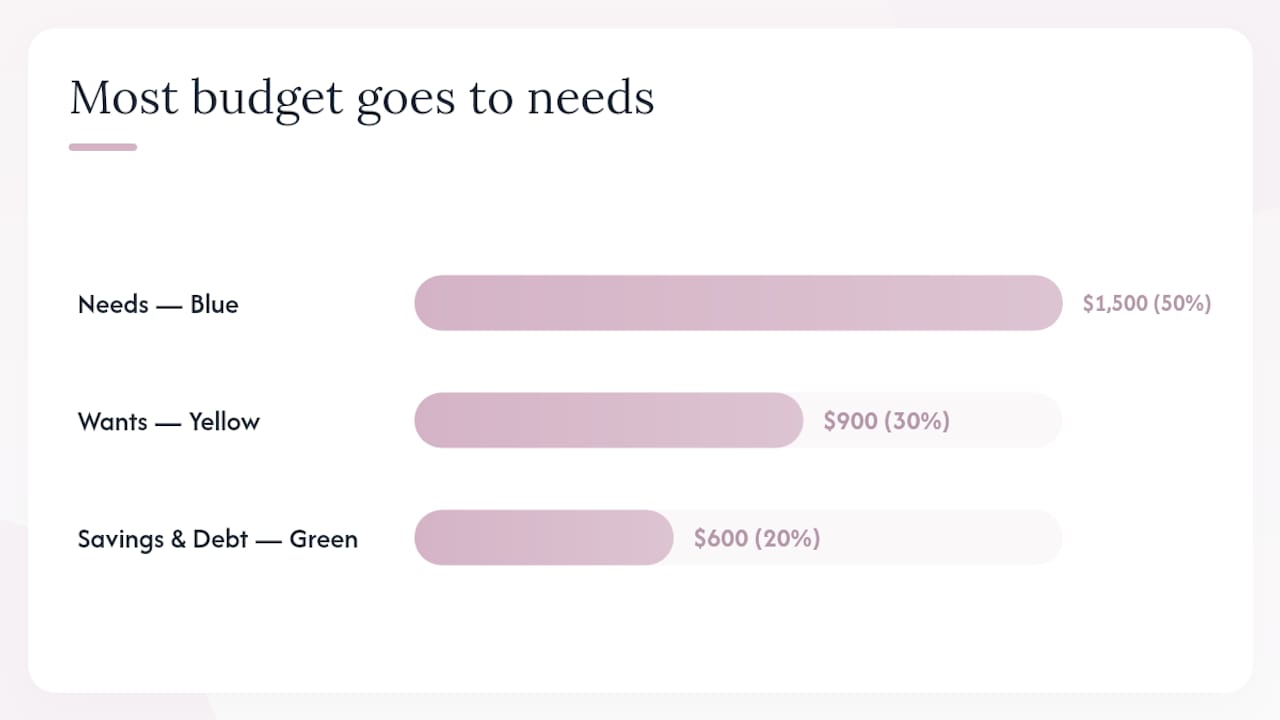
Every transaction gets tagged blue, yellow, or green. At month’s end, if your blue total exceeds $1,500, you know exactly where to look.
70-10-10-10 color layout (same $3,000 income)
| Category | Rule % | Monthly Amount | Suggested Color |
|---|---|---|---|
| Living expenses | 70% | $2,100 | Blue |
| Savings | 10% | $300 | Green |
| Investing | 10% | $300 | Purple |
| Giving or debt | 10% | $300 | Orange |
Broad categories vs. line items
Map colors to broad categories (blue = all needs) when you are starting out or when your income is tight and you need fast decisions. Map to individual line items (separate colors for rent, groceries, and utilities) when you want to find specific leaks. Most people start broad and add detail after two or three months once the habit is solid.
How long does setup take and what does it cost?
Time:
- Quick start (one paycheck, 6 categories, paper or basic spreadsheet): 30–60 minutes
- Full audit (two months of statements, 8–10 categories, conditional formatting): 2–4 hours
Cost:
- Google Sheets template: free
- Basic highlighters and colored pens: $0–$10
- Printable envelope set (downloaded and printed at home): $0–$15
- Bundled physical cash-stuffing kit with envelopes, binder pages, and accessories: $25–$60
What to buy now vs. what can wait:
- Start with a free Google Sheets template and whatever highlighters you already own.
- Add a printable or handmade envelope set once you have confirmed which categories you actually use.
- Invest in a full binder kit or handcrafted envelope bundle after your first complete month, when you know the system fits your life.
Where can you find ready-to-use templates and tools?
Google Sheets
Search “budget tracker Google Sheets template” in Google Drive’s template gallery, or duplicate any shared template from the Sheets template library. Once open, go to File → Make a copy to save it to your own Drive. Then add your category names, budget amounts, and the conditional formatting rules from the tutorial above.
Microsoft Excel
The Microsoft Excel personal budget planner includes color-coded charts and dashboards that update in real time as you enter transactions. It is a strong option if you already use Microsoft 365 and want visual trend tracking without building formulas from scratch.
Printable envelopes and binder pages
| Format | Best for | Update frequency | Cost |
|---|---|---|---|
| Google Sheets with conditional formatting | Digital-first, automation lovers | Daily or weekly | Free |
| Microsoft Excel dashboard | Microsoft 365 users, chart-heavy review | Weekly or monthly | Included in subscription |
| Printable budget form | Paper-first, visual learners | Weekly | $0–$15 (print at home) |
| Handmade cash-stuffing envelopes | Cash budgeters, tactile trackers | Per paycheck | $25–$60 for a kit |
For a binder-based layout, the Mariaandherjournal budget binder guide walks through page order, pocket placement, and which printables to pair together.
Do visual budget systems actually produce results?
The short answer is yes, and the mechanism is straightforward. When spending data is color-coded, the brain processes category patterns faster than it processes rows of numbers. That speed reduces the mental effort of a weekly check-in, which makes people more likely to do it consistently.
Financial coach Christina Montalvo, who developed the 3-highlighter method, puts it directly:
“Categories are fluid. They should reflect what you value right now. If you’re in an aggressive savings push, temporarily reclassify your discretionary spending so every dollar you redirect shows up in your savings color. The system should move with your goals, not lock you into last year’s priorities.”
— Christina Montalvo, The Confidence Project
Mariaandherjournal customers who use the cash-stuffing envelope system alongside a color-coded binder consistently report that seeing the envelopes labeled and color-matched makes it harder to rationalize overspending. The physical act of moving cash out of an envelope registers differently than swiping a card, and the color label on the envelope reinforces the category boundary every time you open it.
The habit frequency that works for most people: a 5-minute envelope or spreadsheet check twice a week, and a full category review at the end of each month. Daily checks are not necessary unless you are in a tight month or an aggressive savings sprint.
Key Takeaways
Color-coding a budget works because it converts abstract numbers into instant visual patterns, making weekly check-ins faster and category overspending impossible to ignore.
| Point | Details |
|---|---|
| Start with several categories | Fewer than six lumps too much together; more than ten creates color confusion. |
| Enter transactions before coloring | Log everything first, then highlight, to avoid miscategorizing split-account transactions. |
| Use three digital alert colors | Red for over budget, yellow at 80% of budget, green for under budget, applied via conditional formatting. |
| Review weekly and monthly | A 5-minute mid-week check catches overspending early; a monthly total resets next month’s plan. |
| Mariaandherjournal starter kits | Handmade cash-stuffing envelopes and savings challenge bundles give paper-first budgeters a ready color-coded system. |
Why the prettiest budget is often the one you actually open
Here is something most budgeting guides skip: the aesthetic of your tracker is a functional choice, not a vanity one. A color scheme you find genuinely pleasing lowers the activation energy of sitting down to review your finances. That friction reduction is real. A tracker that feels like a chore gets opened once and abandoned; one that feels like a planner page you enjoy gets opened twice a week without a second thought.
Start with one paycheck. Not a full month, not a year-end audit. One paycheck, six categories, three colors. Get the totals on paper or in a spreadsheet. See what surprises you. Then adjust. Perfection on the first pass is not the goal; a system you return to is.
The readers who stick with color-coded budgeting longest are not the ones who built the most elaborate spreadsheet. They are the ones who picked colors they liked, kept the categories simple enough to remember, and made the weekly check-in feel like something they wanted to do rather than something they had to do. That is the whole secret, and it costs nothing extra to apply it from day one.
Handcrafted budgeting tools from Mariaandherjournal
If you have decided the paper-first path fits your style, the Cash Stuffing Essentials collection at Mariaandherjournal gives you a ready starting kit without hunting down supplies separately. The handmade envelopes come in coordinated color sets designed to pair with a binder workflow, so your categories are visually distinct from the moment you label them.
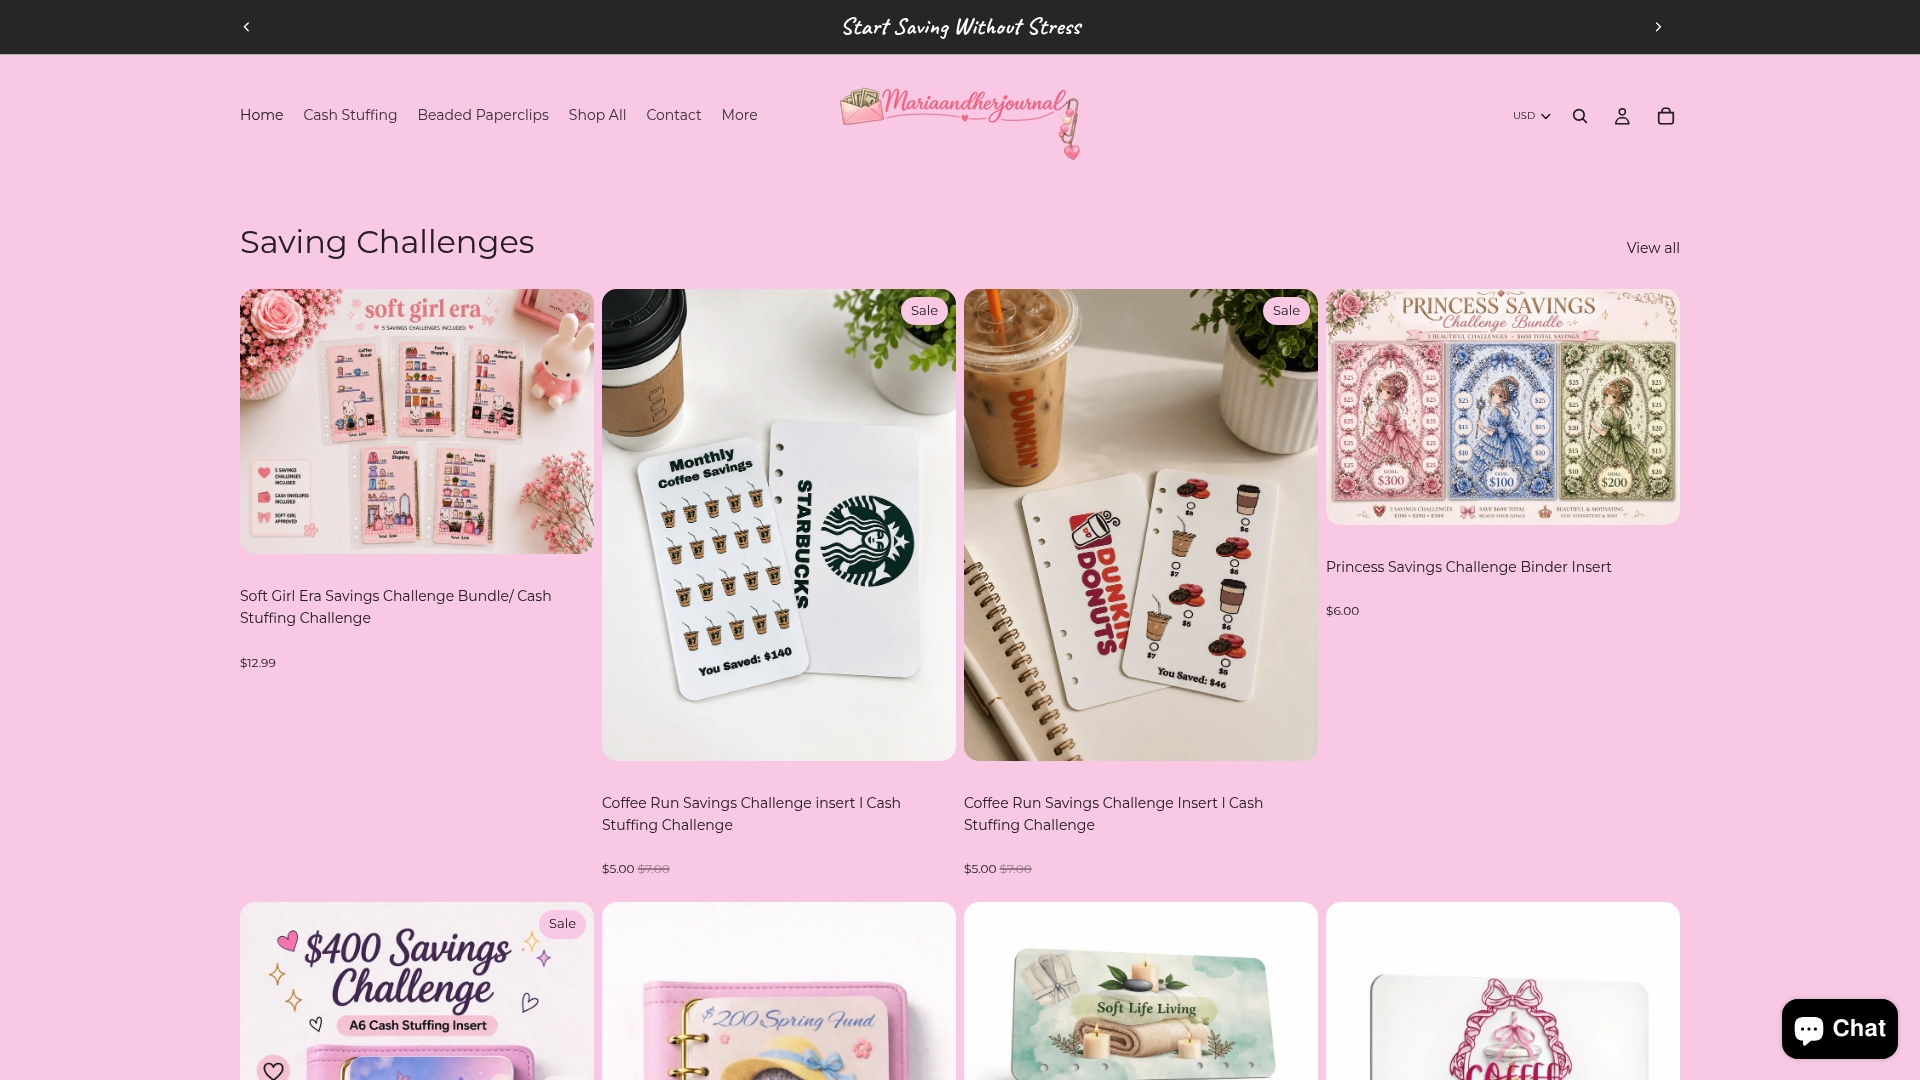
The Saving Challenges bundles add a goal-tracking layer that maps directly onto your savings color category, making progress visible in a way a spreadsheet cell rarely does. And if you use a planner alongside your binder, the beaded paperclip bookmarks keep your current month’s pages marked without bending corners or losing your place mid-month.
Prices for individual envelope sets start in the $25–$60 range for bundled kits. Every item is handmade, which means the quality and the detail are consistent in a way mass-produced stationery rarely matches. Browse the full collection and pick the kit that matches the color palette you chose above.
Useful sources and templates
Recommendation: Start with the free Google Sheets template and the conditional formatting rules above. Once you have confirmed your categories after one full month, add a printable envelope set to reinforce the paper side of the system. The two formats work better together than either does alone.